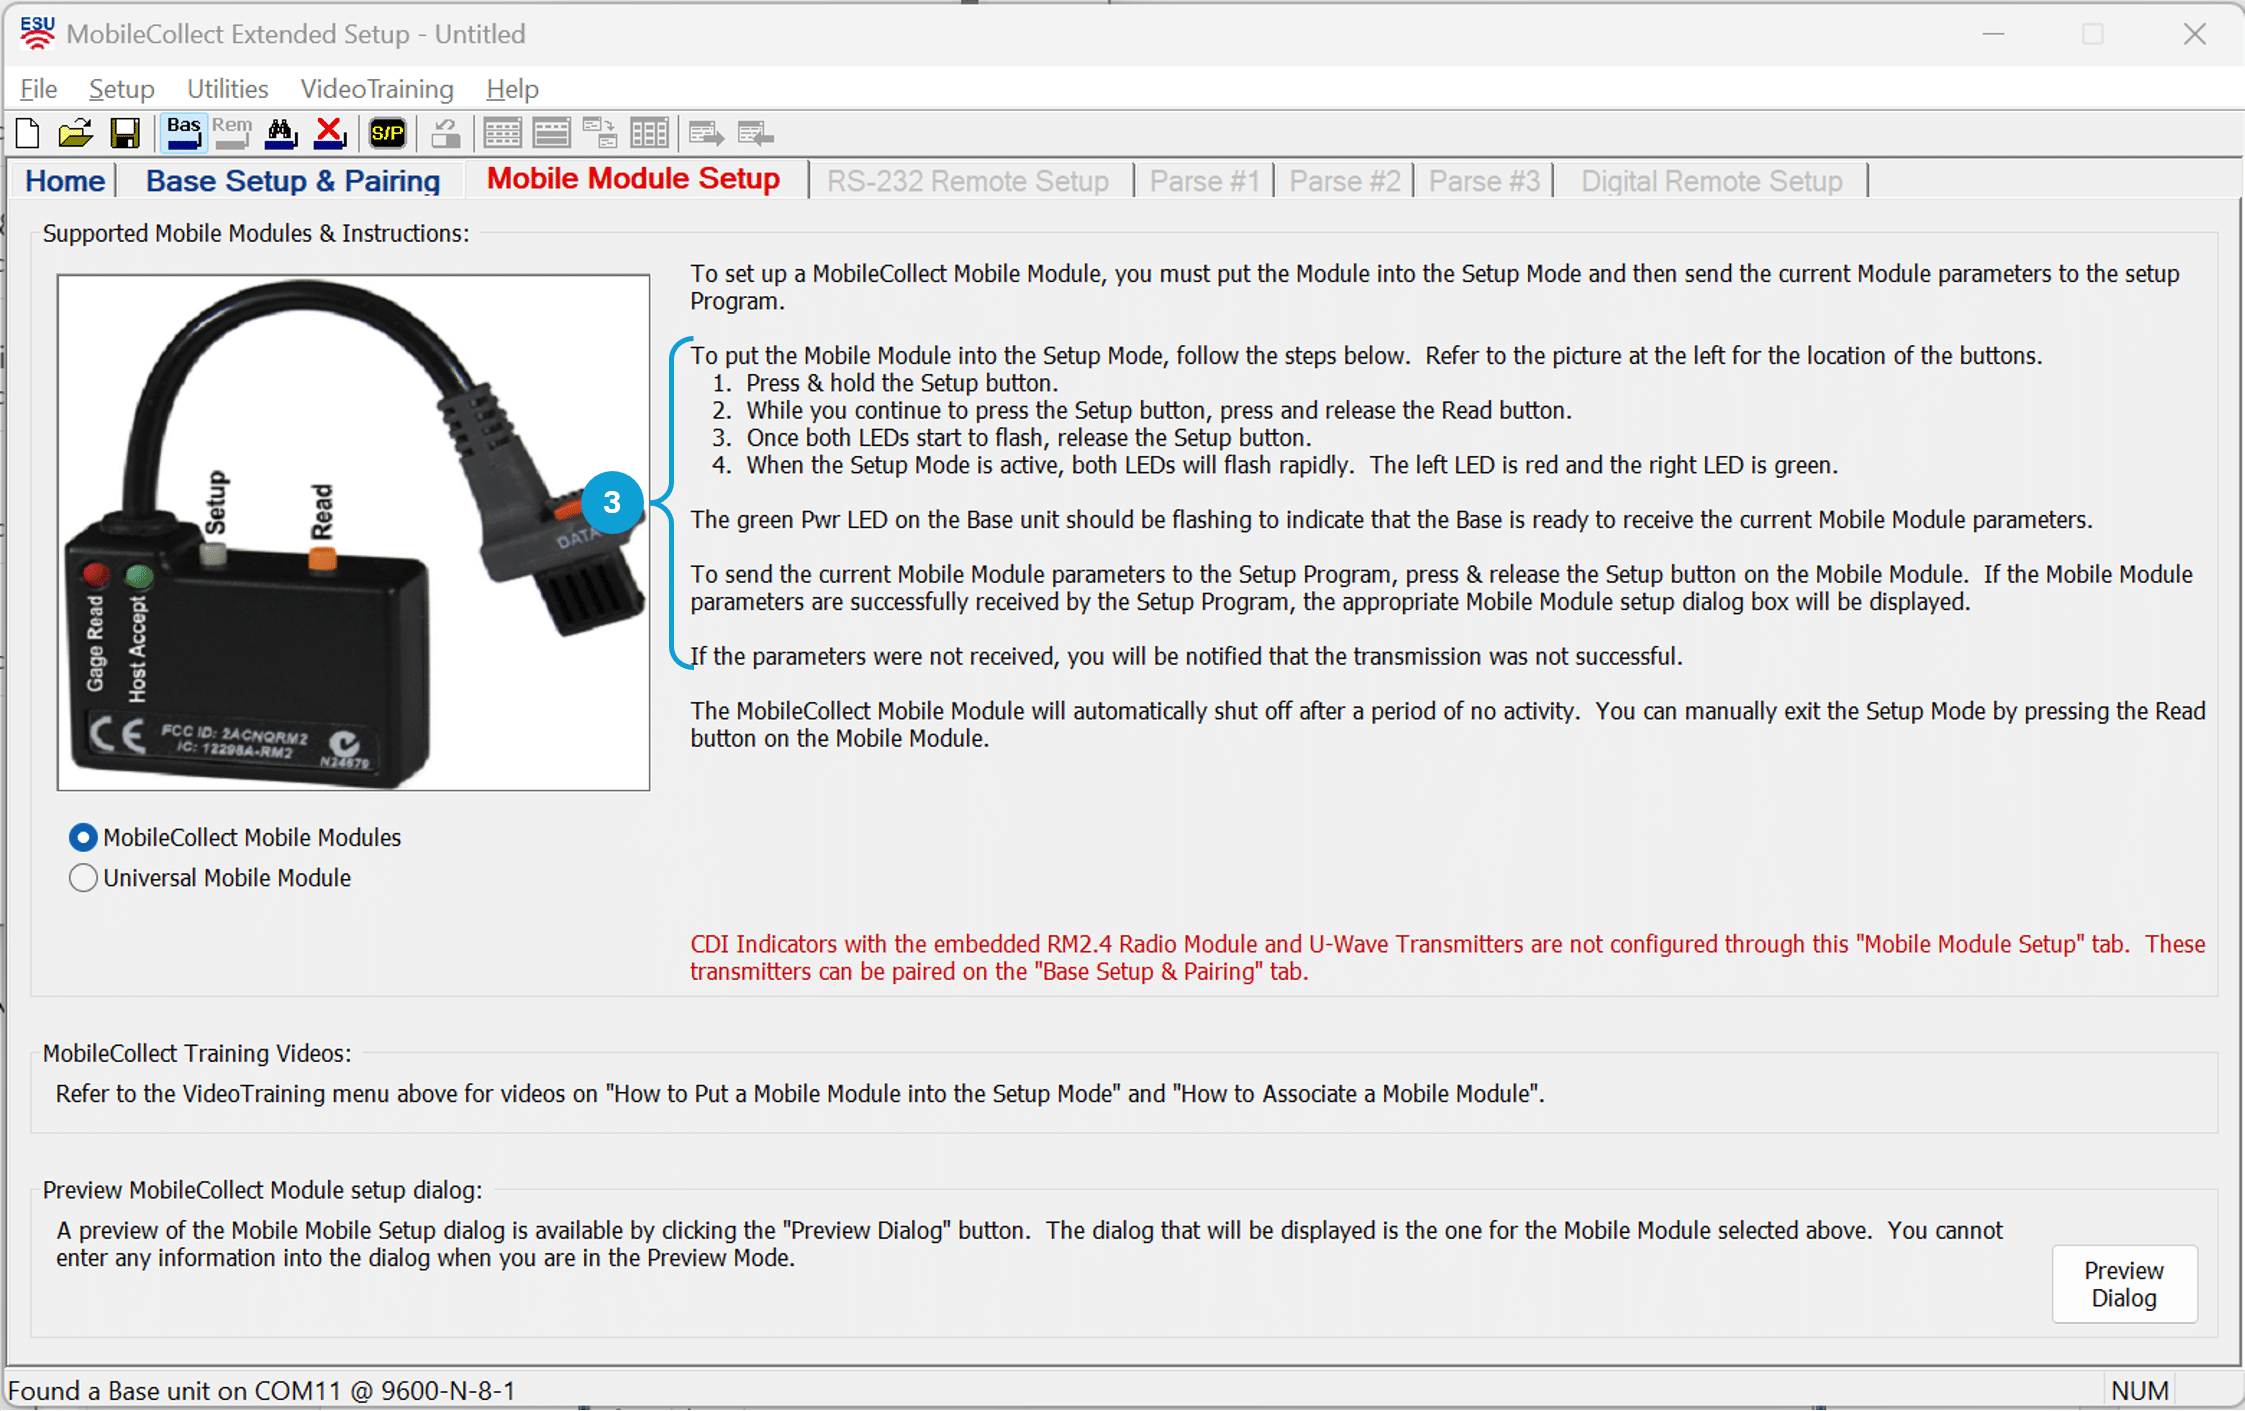
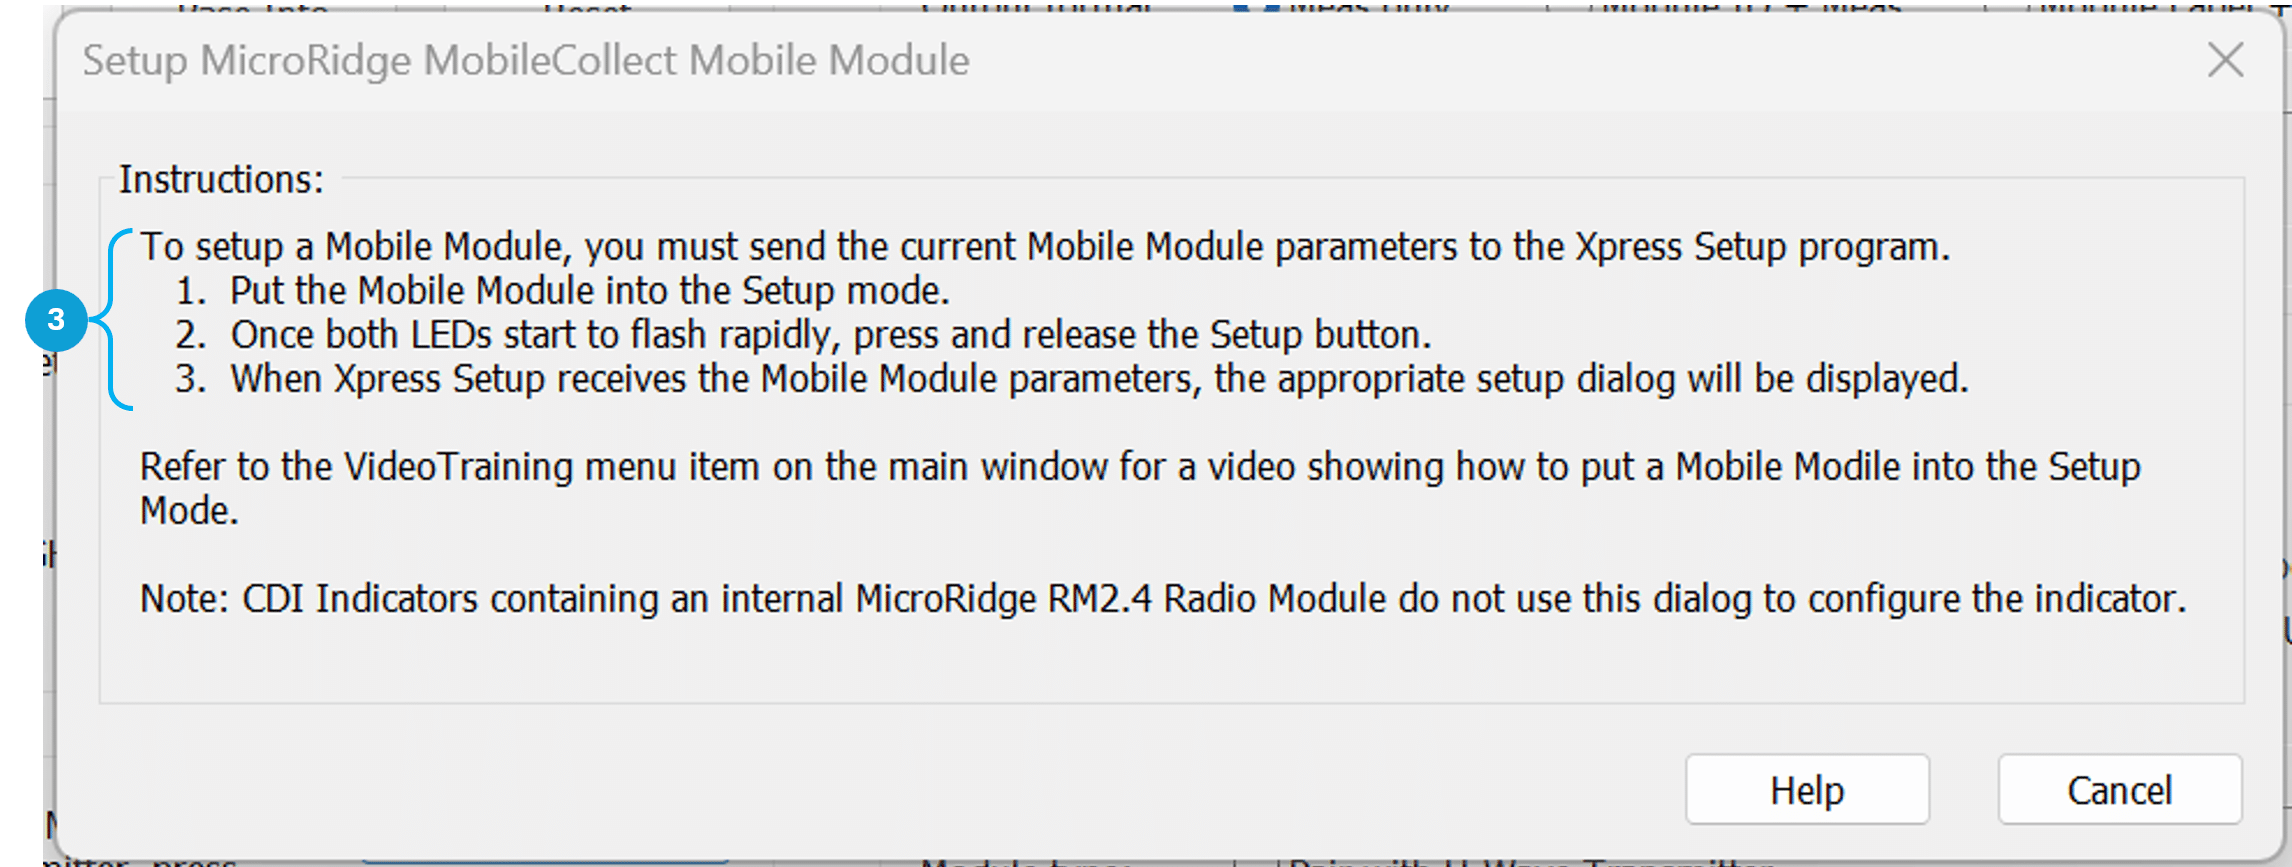
Follow the procedure shown in the window to put the Mobile Module in “Setup Mode”. Once in setup mode, press the setup button again.
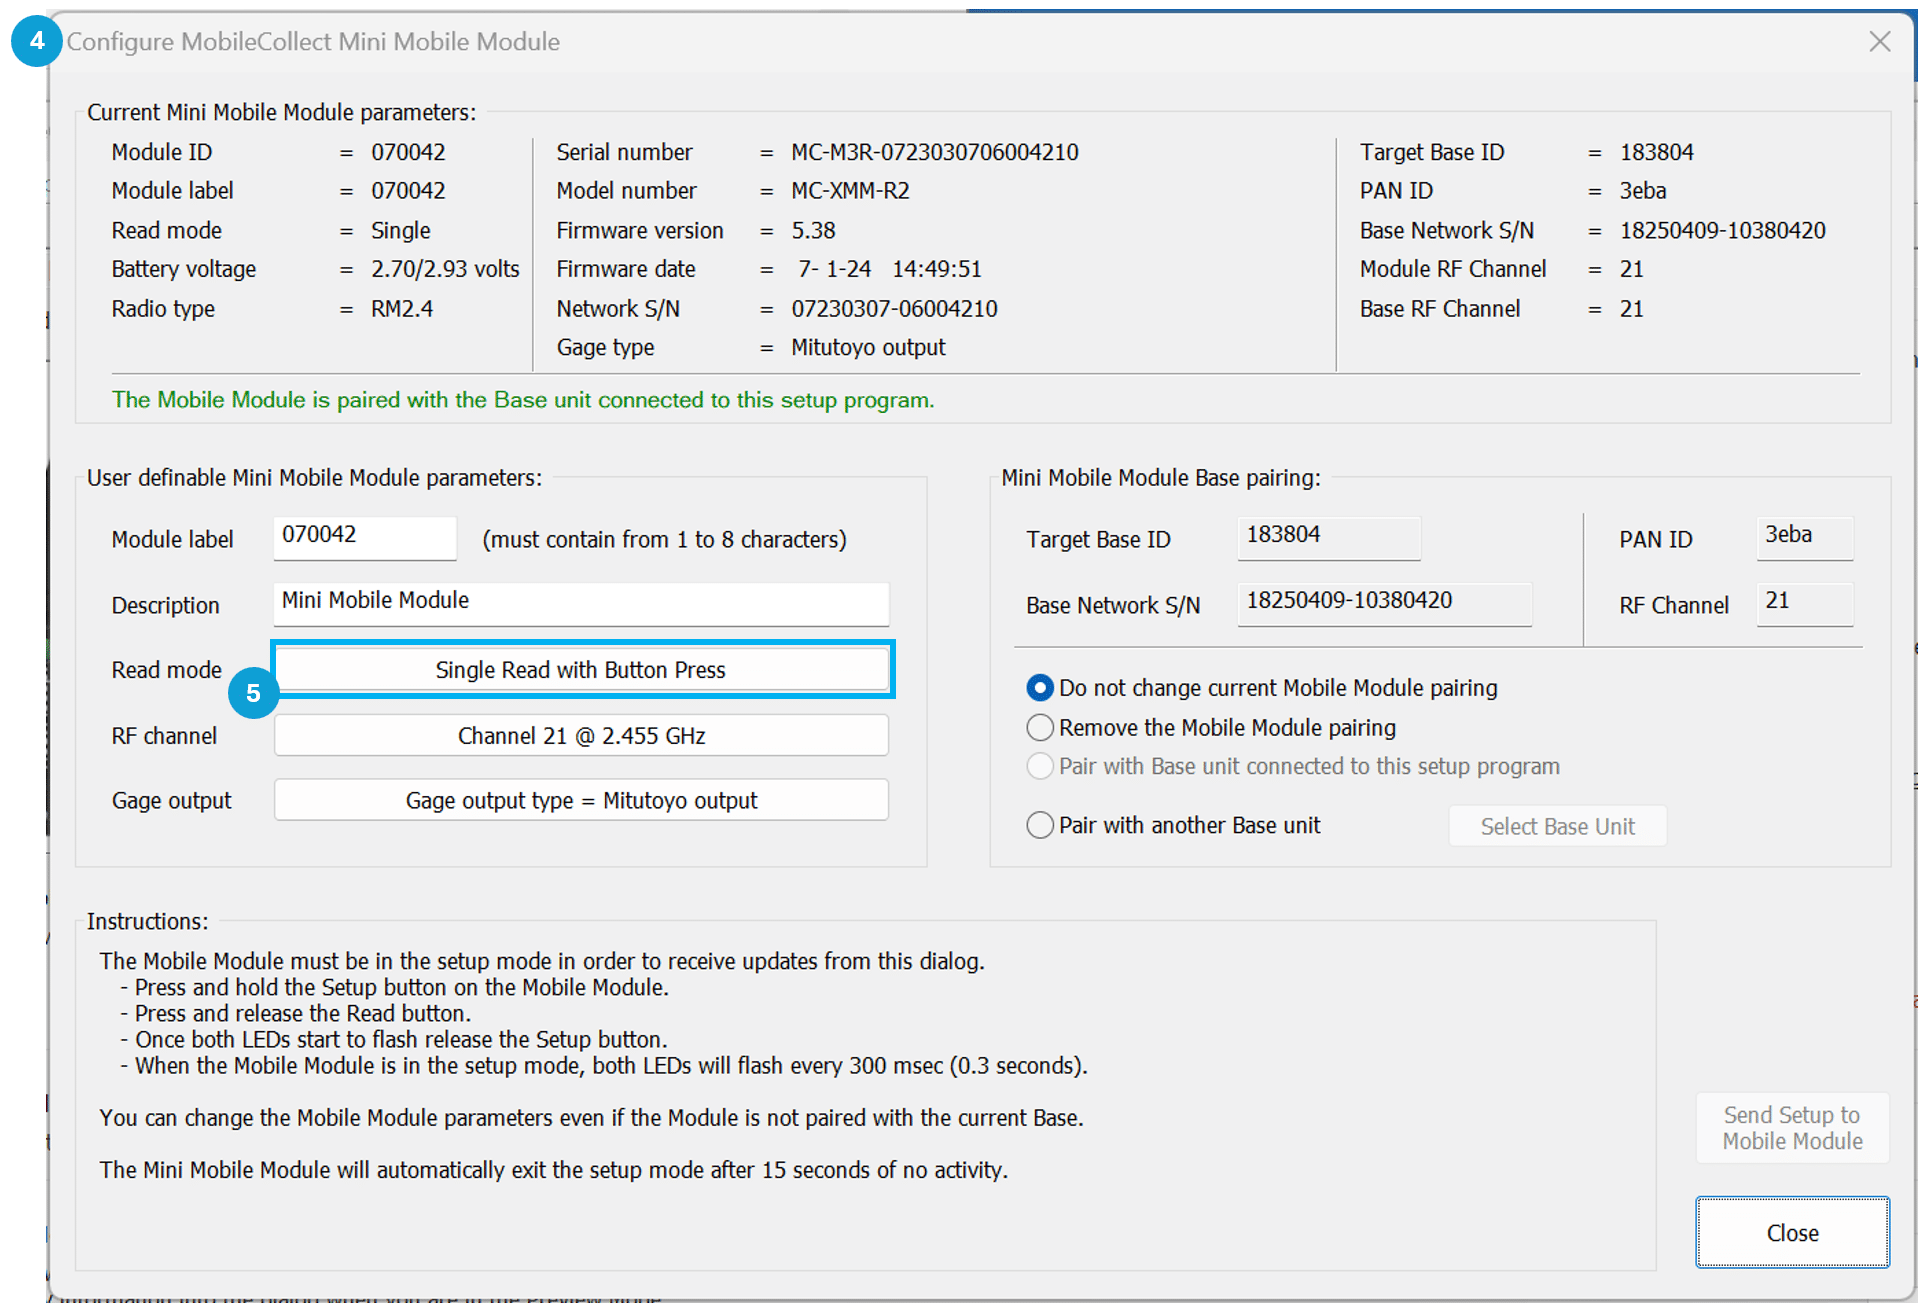
The “Mobile Module Setup” Window will appear.
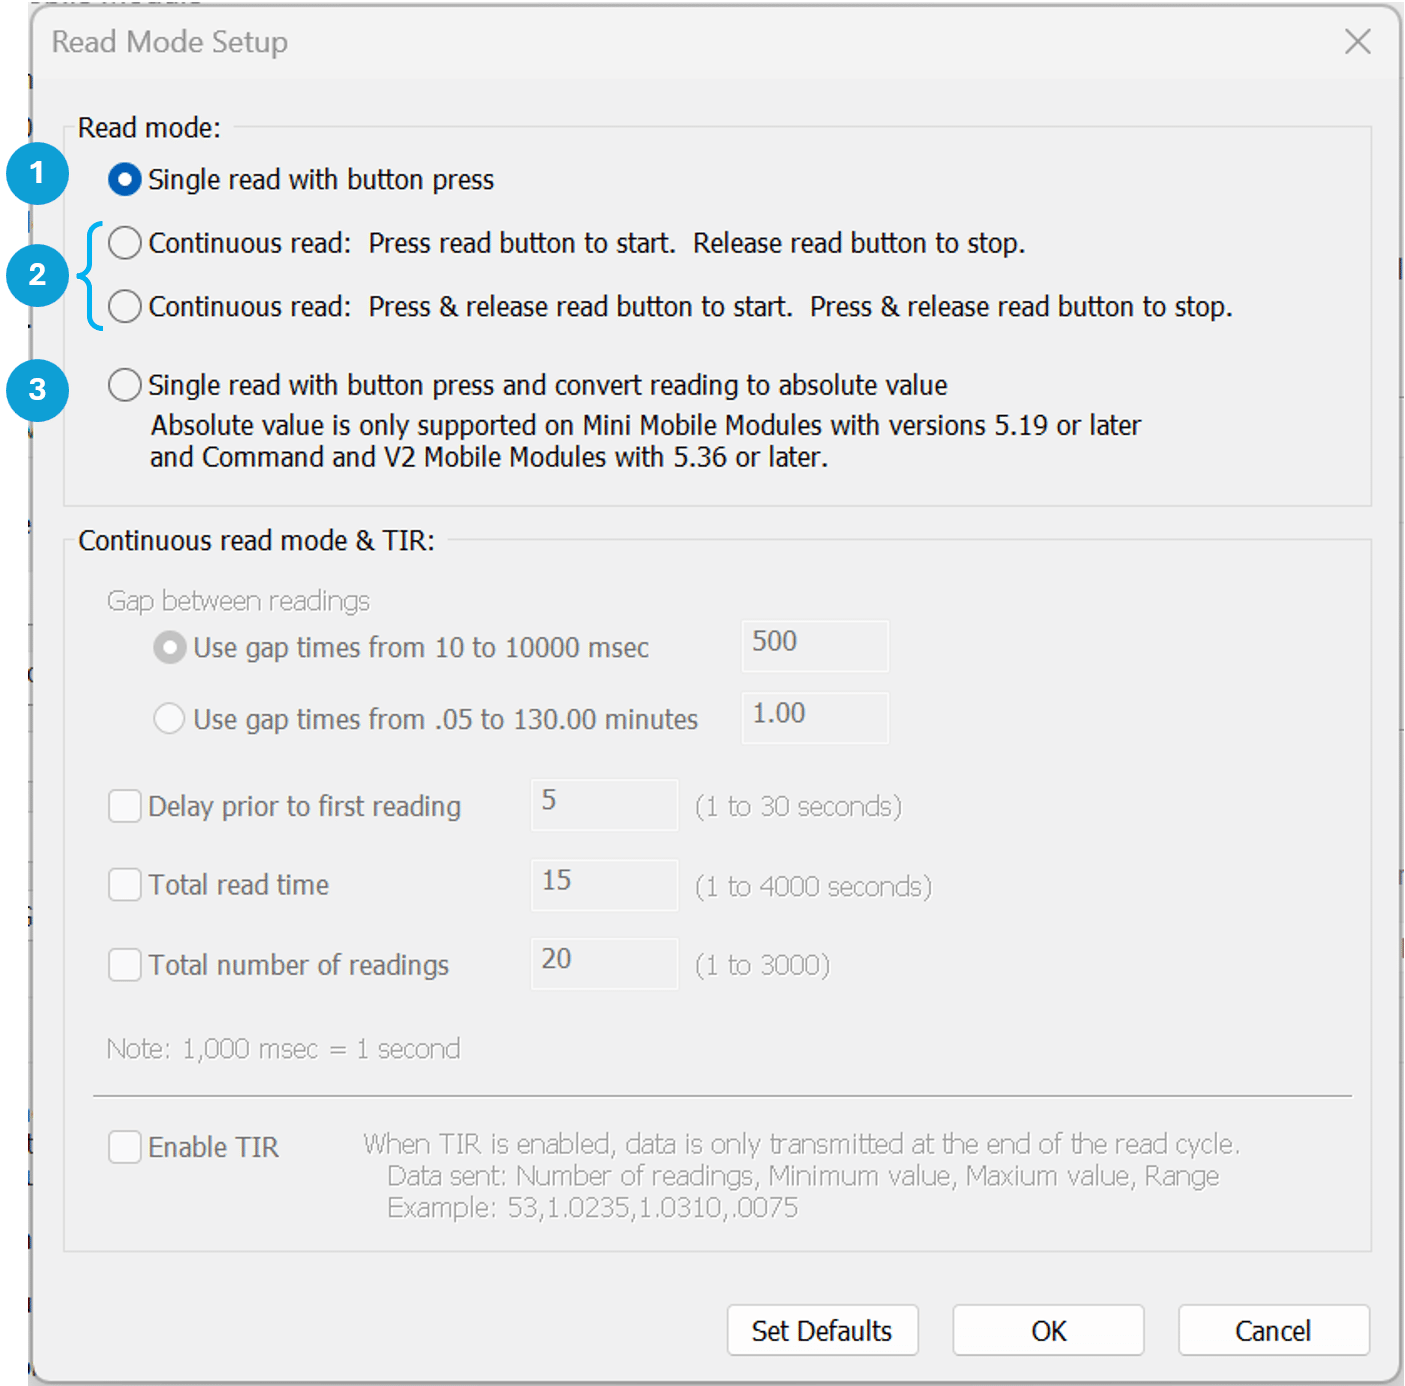
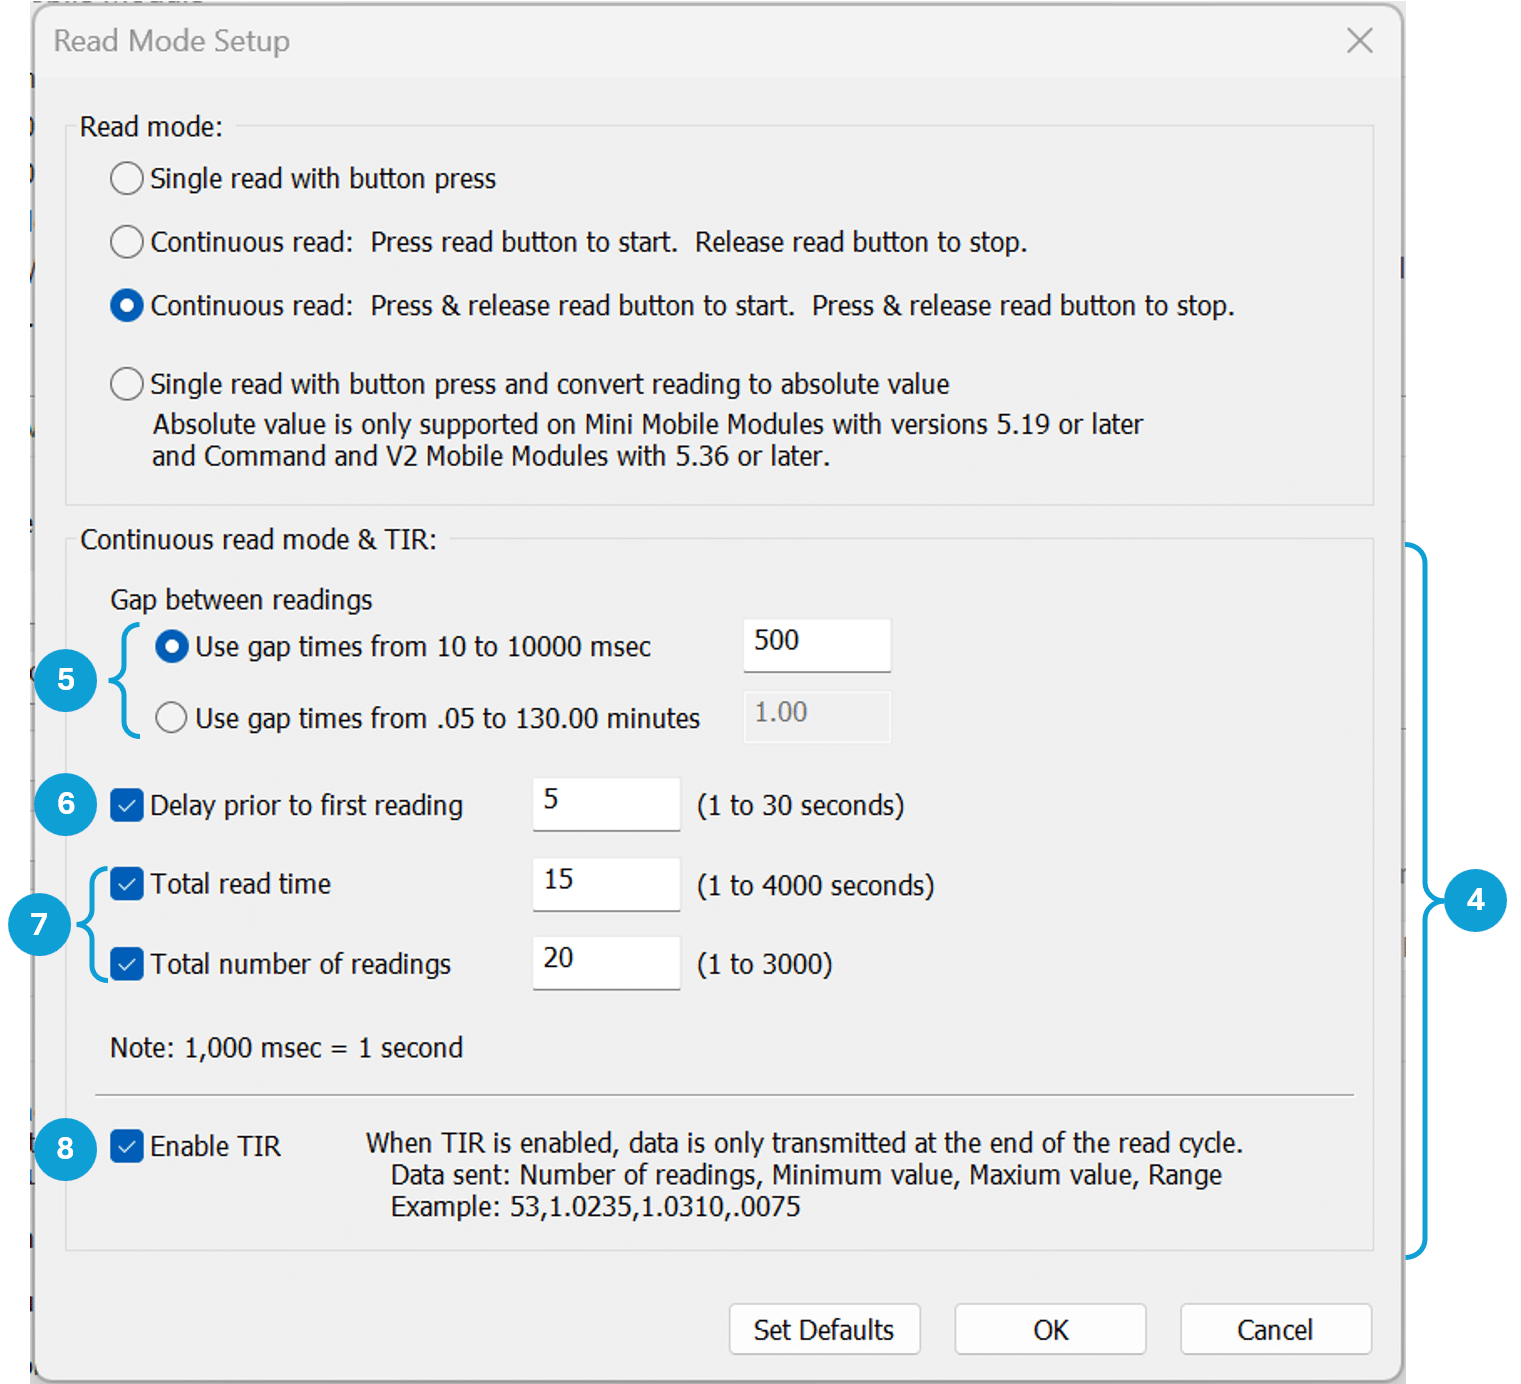
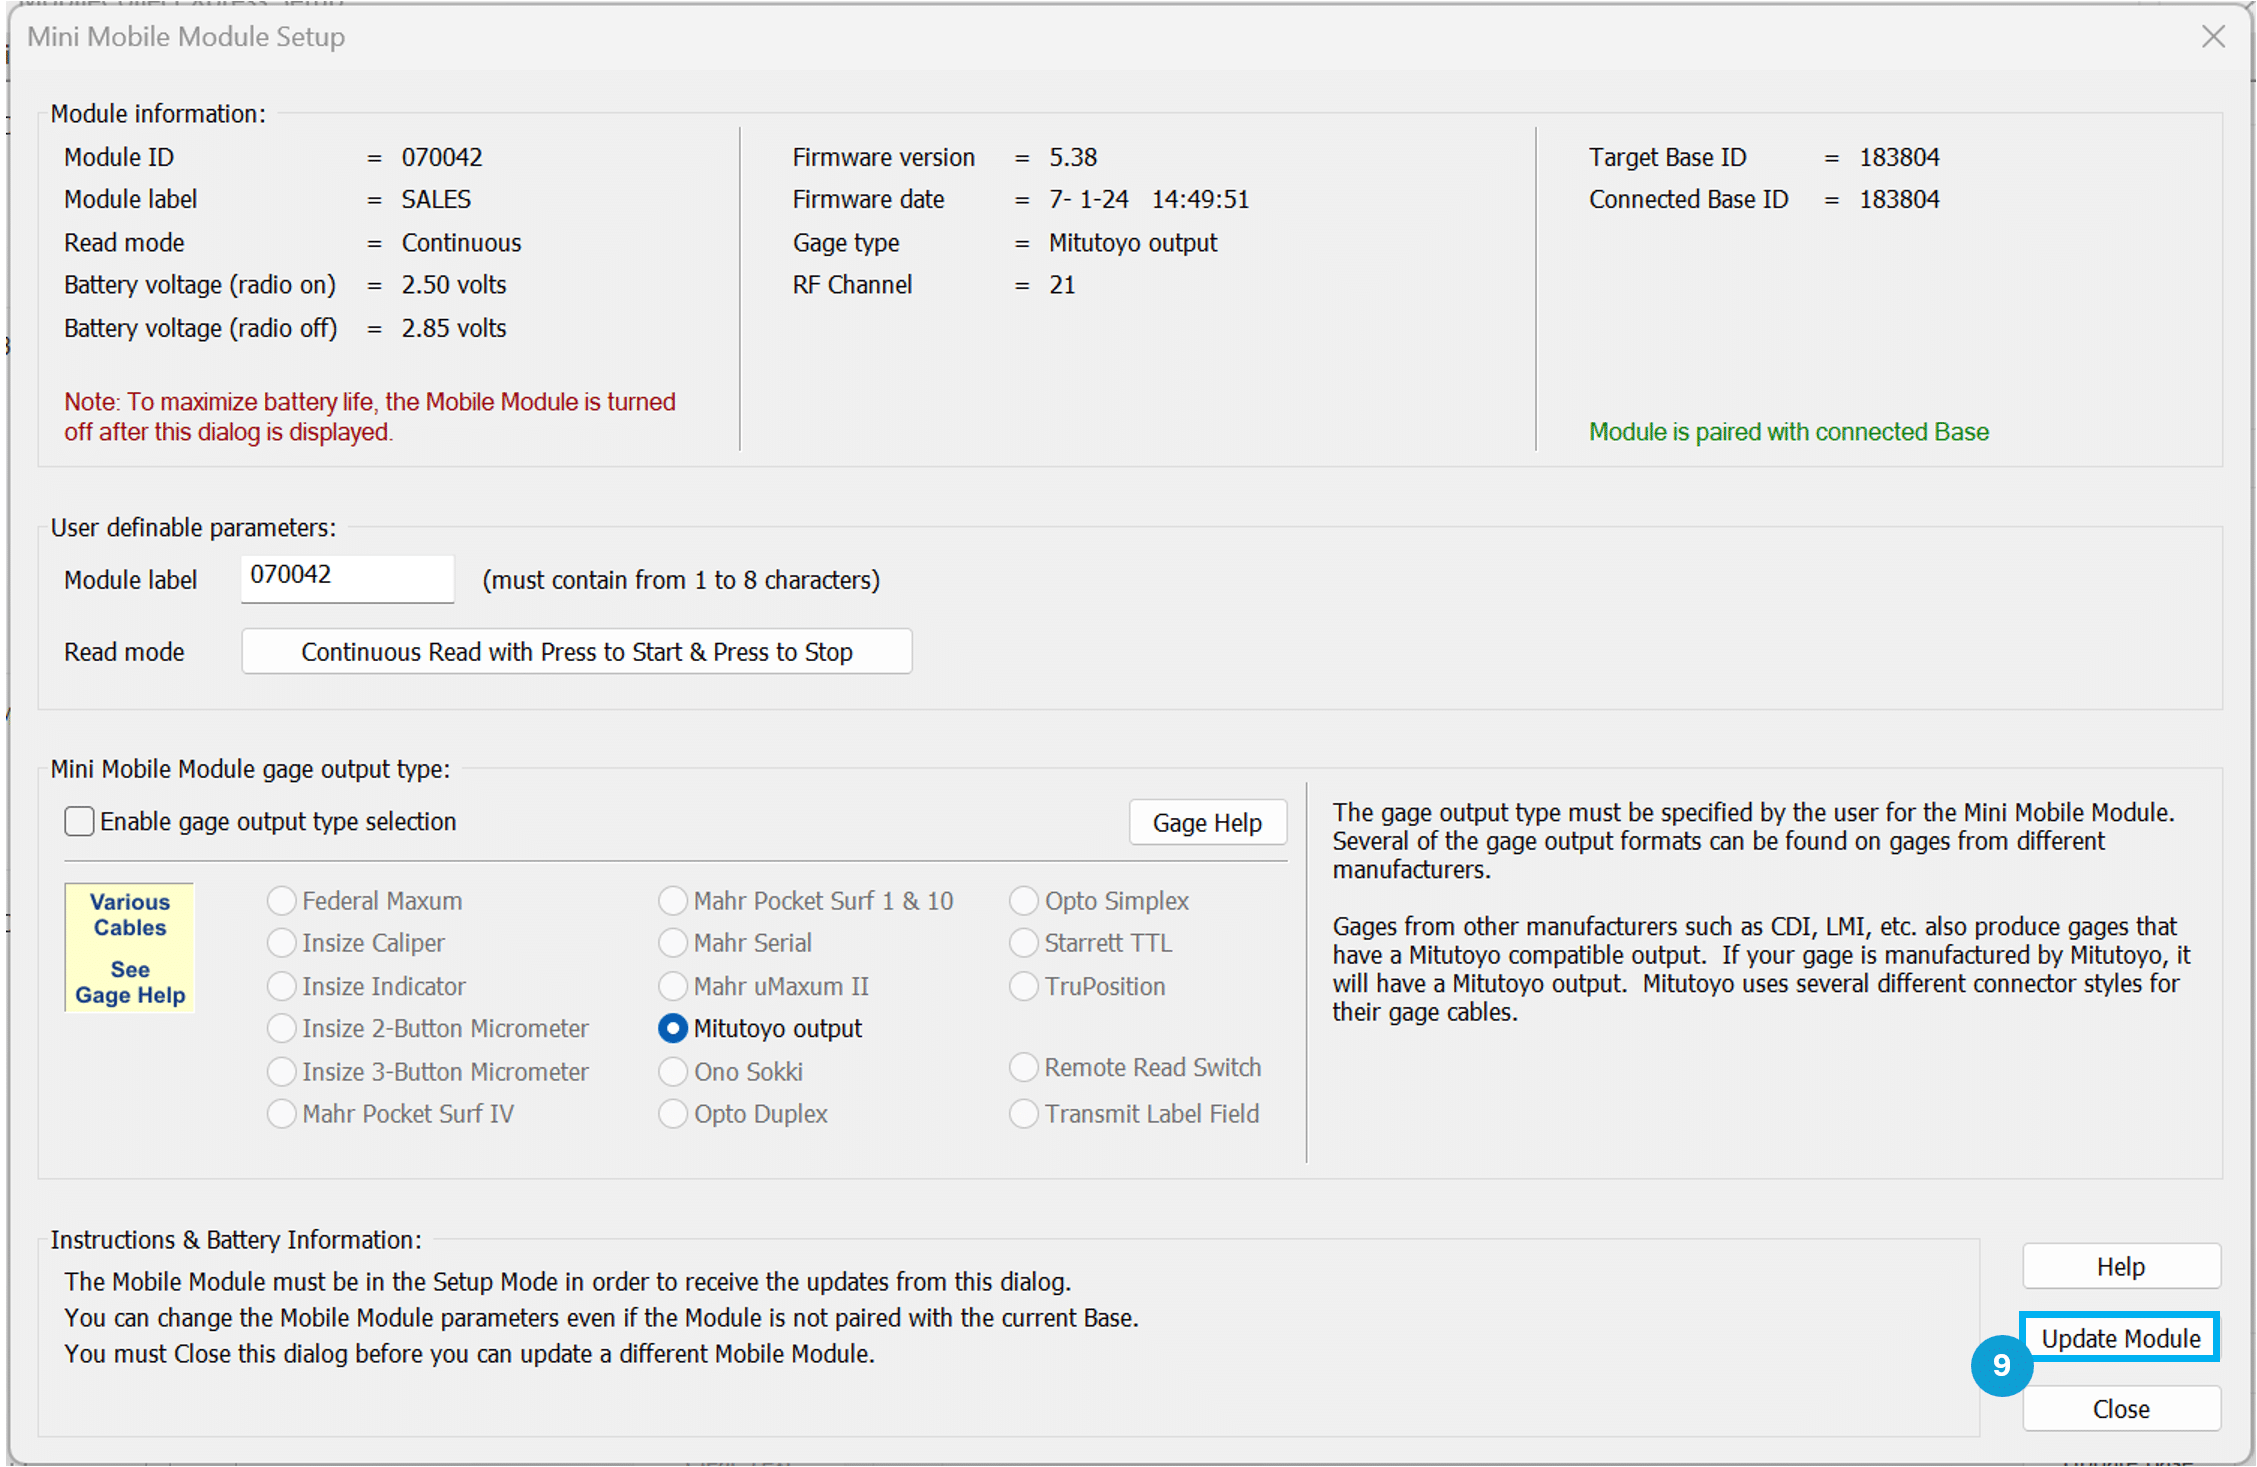
Press the Read Mode Button to open the Read Mode Window.
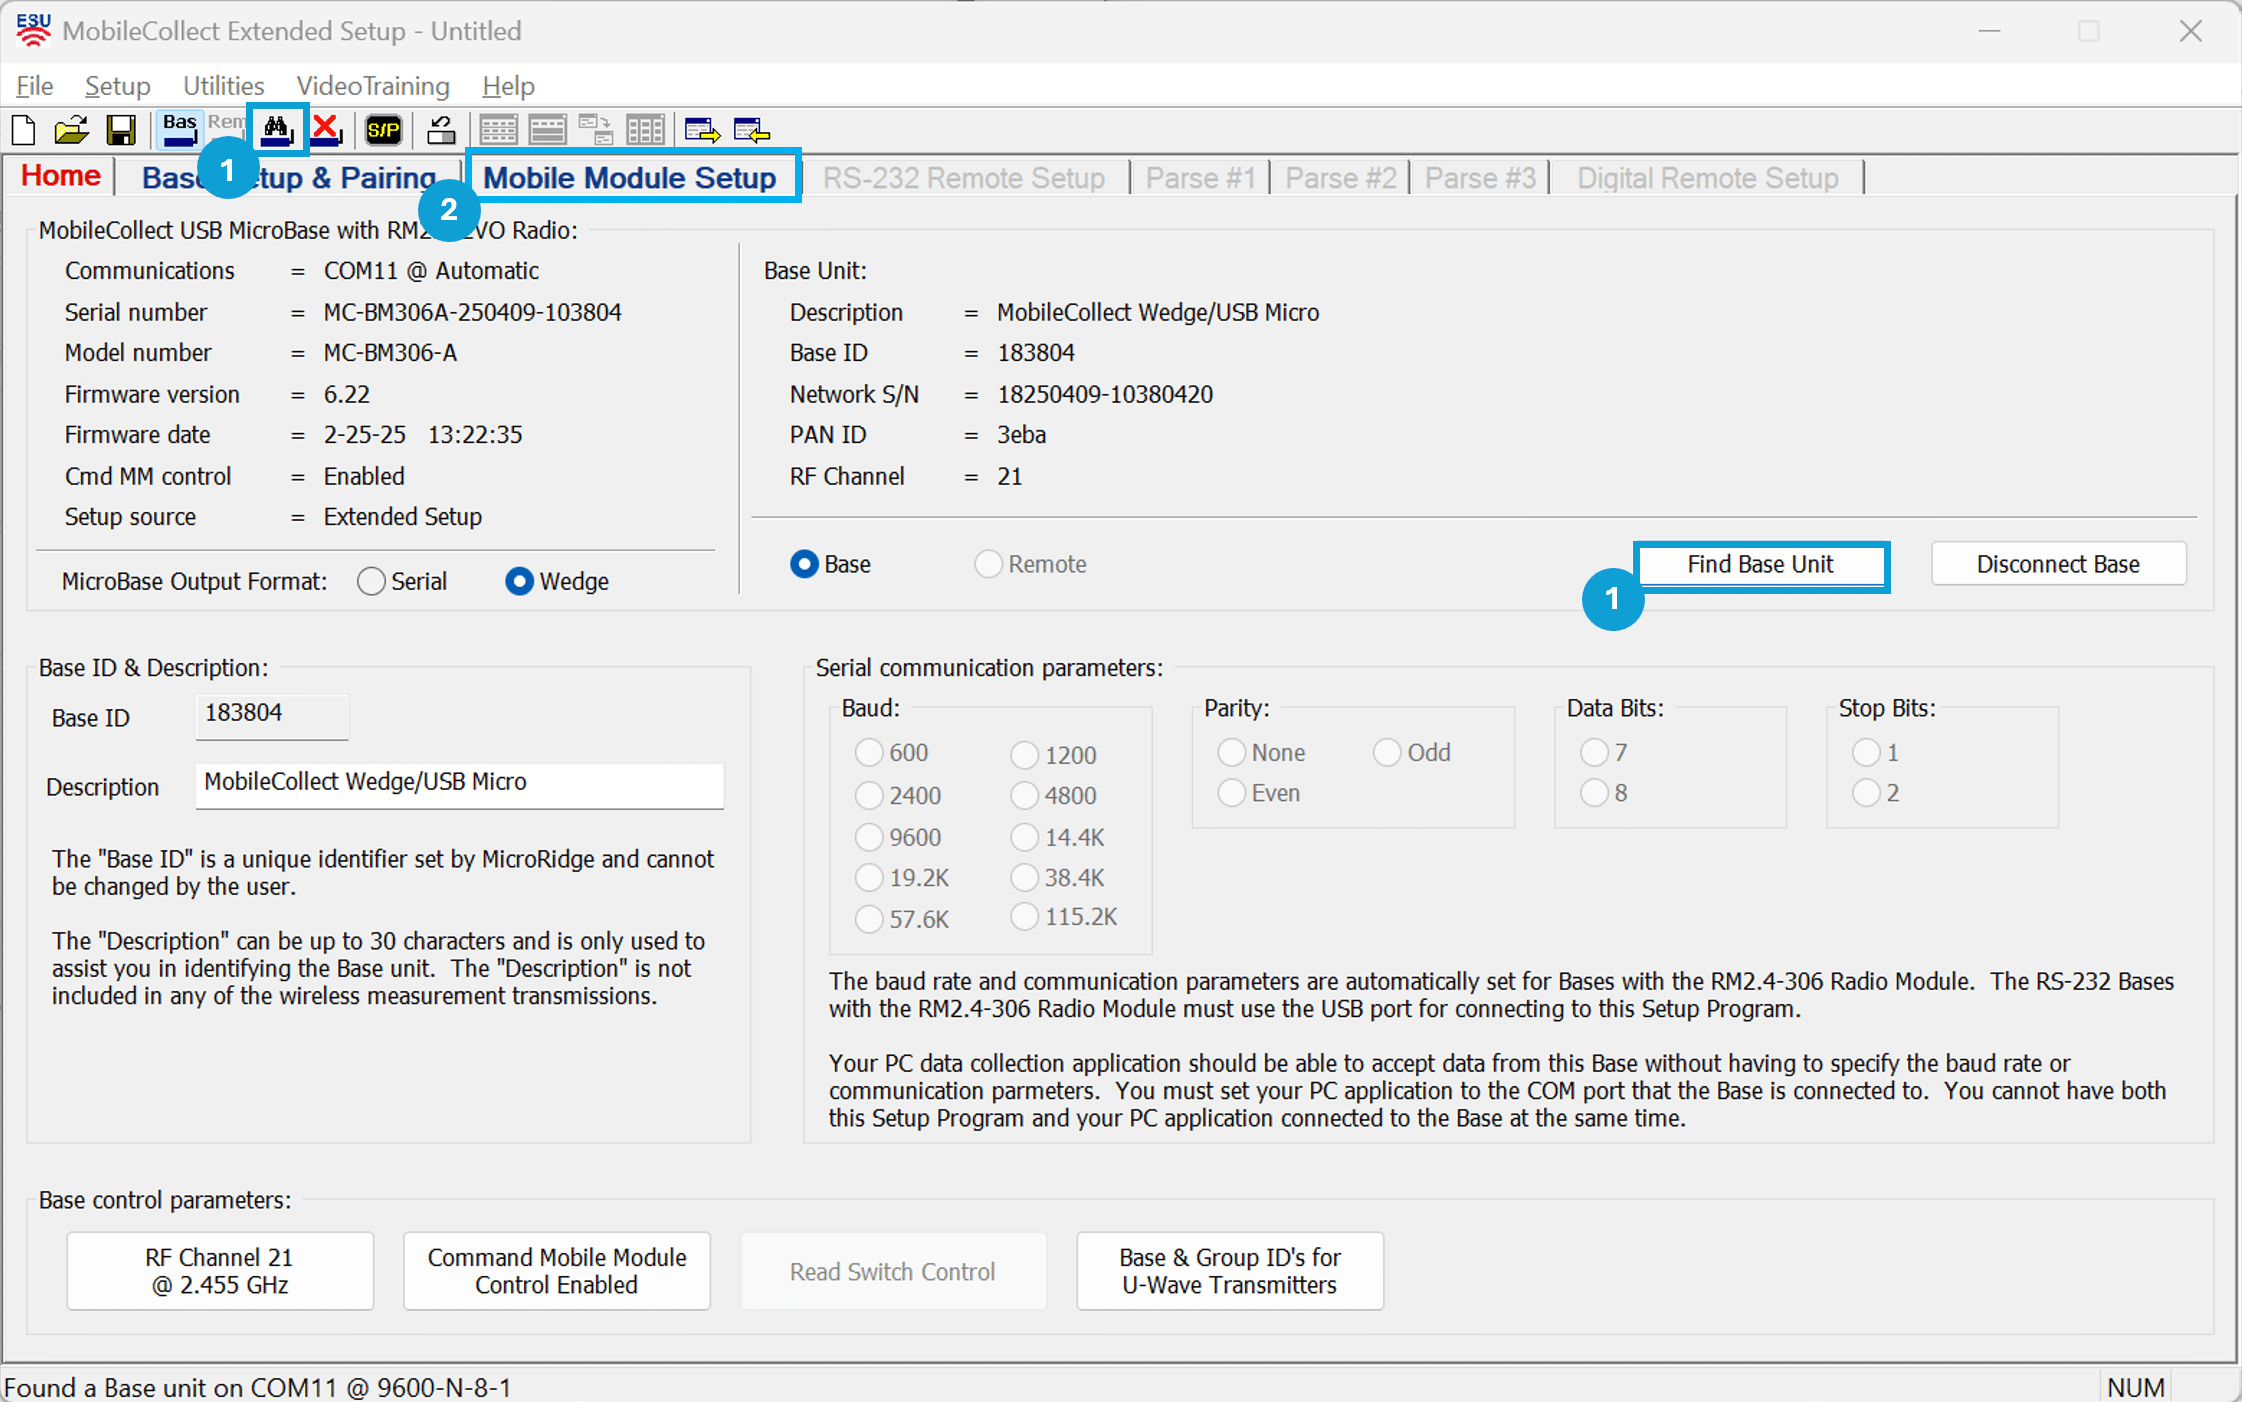
Find Base & Setup Mobile Module Setup
Put Mobile Module Into Setup Mode
Select Read Mode
Continuous and Absolute Read Mode Setup
Mobile Module Read Mode is set to send a Single Reading with every button press by default.
To change to a Continuous Read Mode, select the Desired Continuous Read Mode radio button
To change to absolute value mode, select the Absolute Value radio button
When one of the Continuous Read Modes is selected, the lower “Continuous read mode & TIR” section will activate.
Time between readings can be set from 10 milliseconds to 130 minutes.
A one-time delay can be added. This is useful to prevent unwanted/erroneous initial data. For example, a delay can allow an operator time to setup the fixture before measurements are recorded.
Total read time and/or total number of readings can be set to end continuous read mode.
Note: If both parameters are selected, the continuous readings will stop at whichever parameter is met first.
Note: If “Press read button to start. Release read button to stop” mode is select, the read button must be held down until the time or number of readings parameter is met.
TIR Mode is a special mode where the Mobile Module will take continuous readings based on the selected parameters. After continuous readings have ended, the Mobile Module will output the Number of readings taken, Minimum Value, Maximum Value, and Range.
When completed, click OK to close the “Read Mode Setup” Window. Proceed to update the Mobile Module with the new parameters. Note that you may need to put the Mobile Module Back into Setup Mode to send the new parameters.
Read Mode Types
Continuous Read Mode and TIR
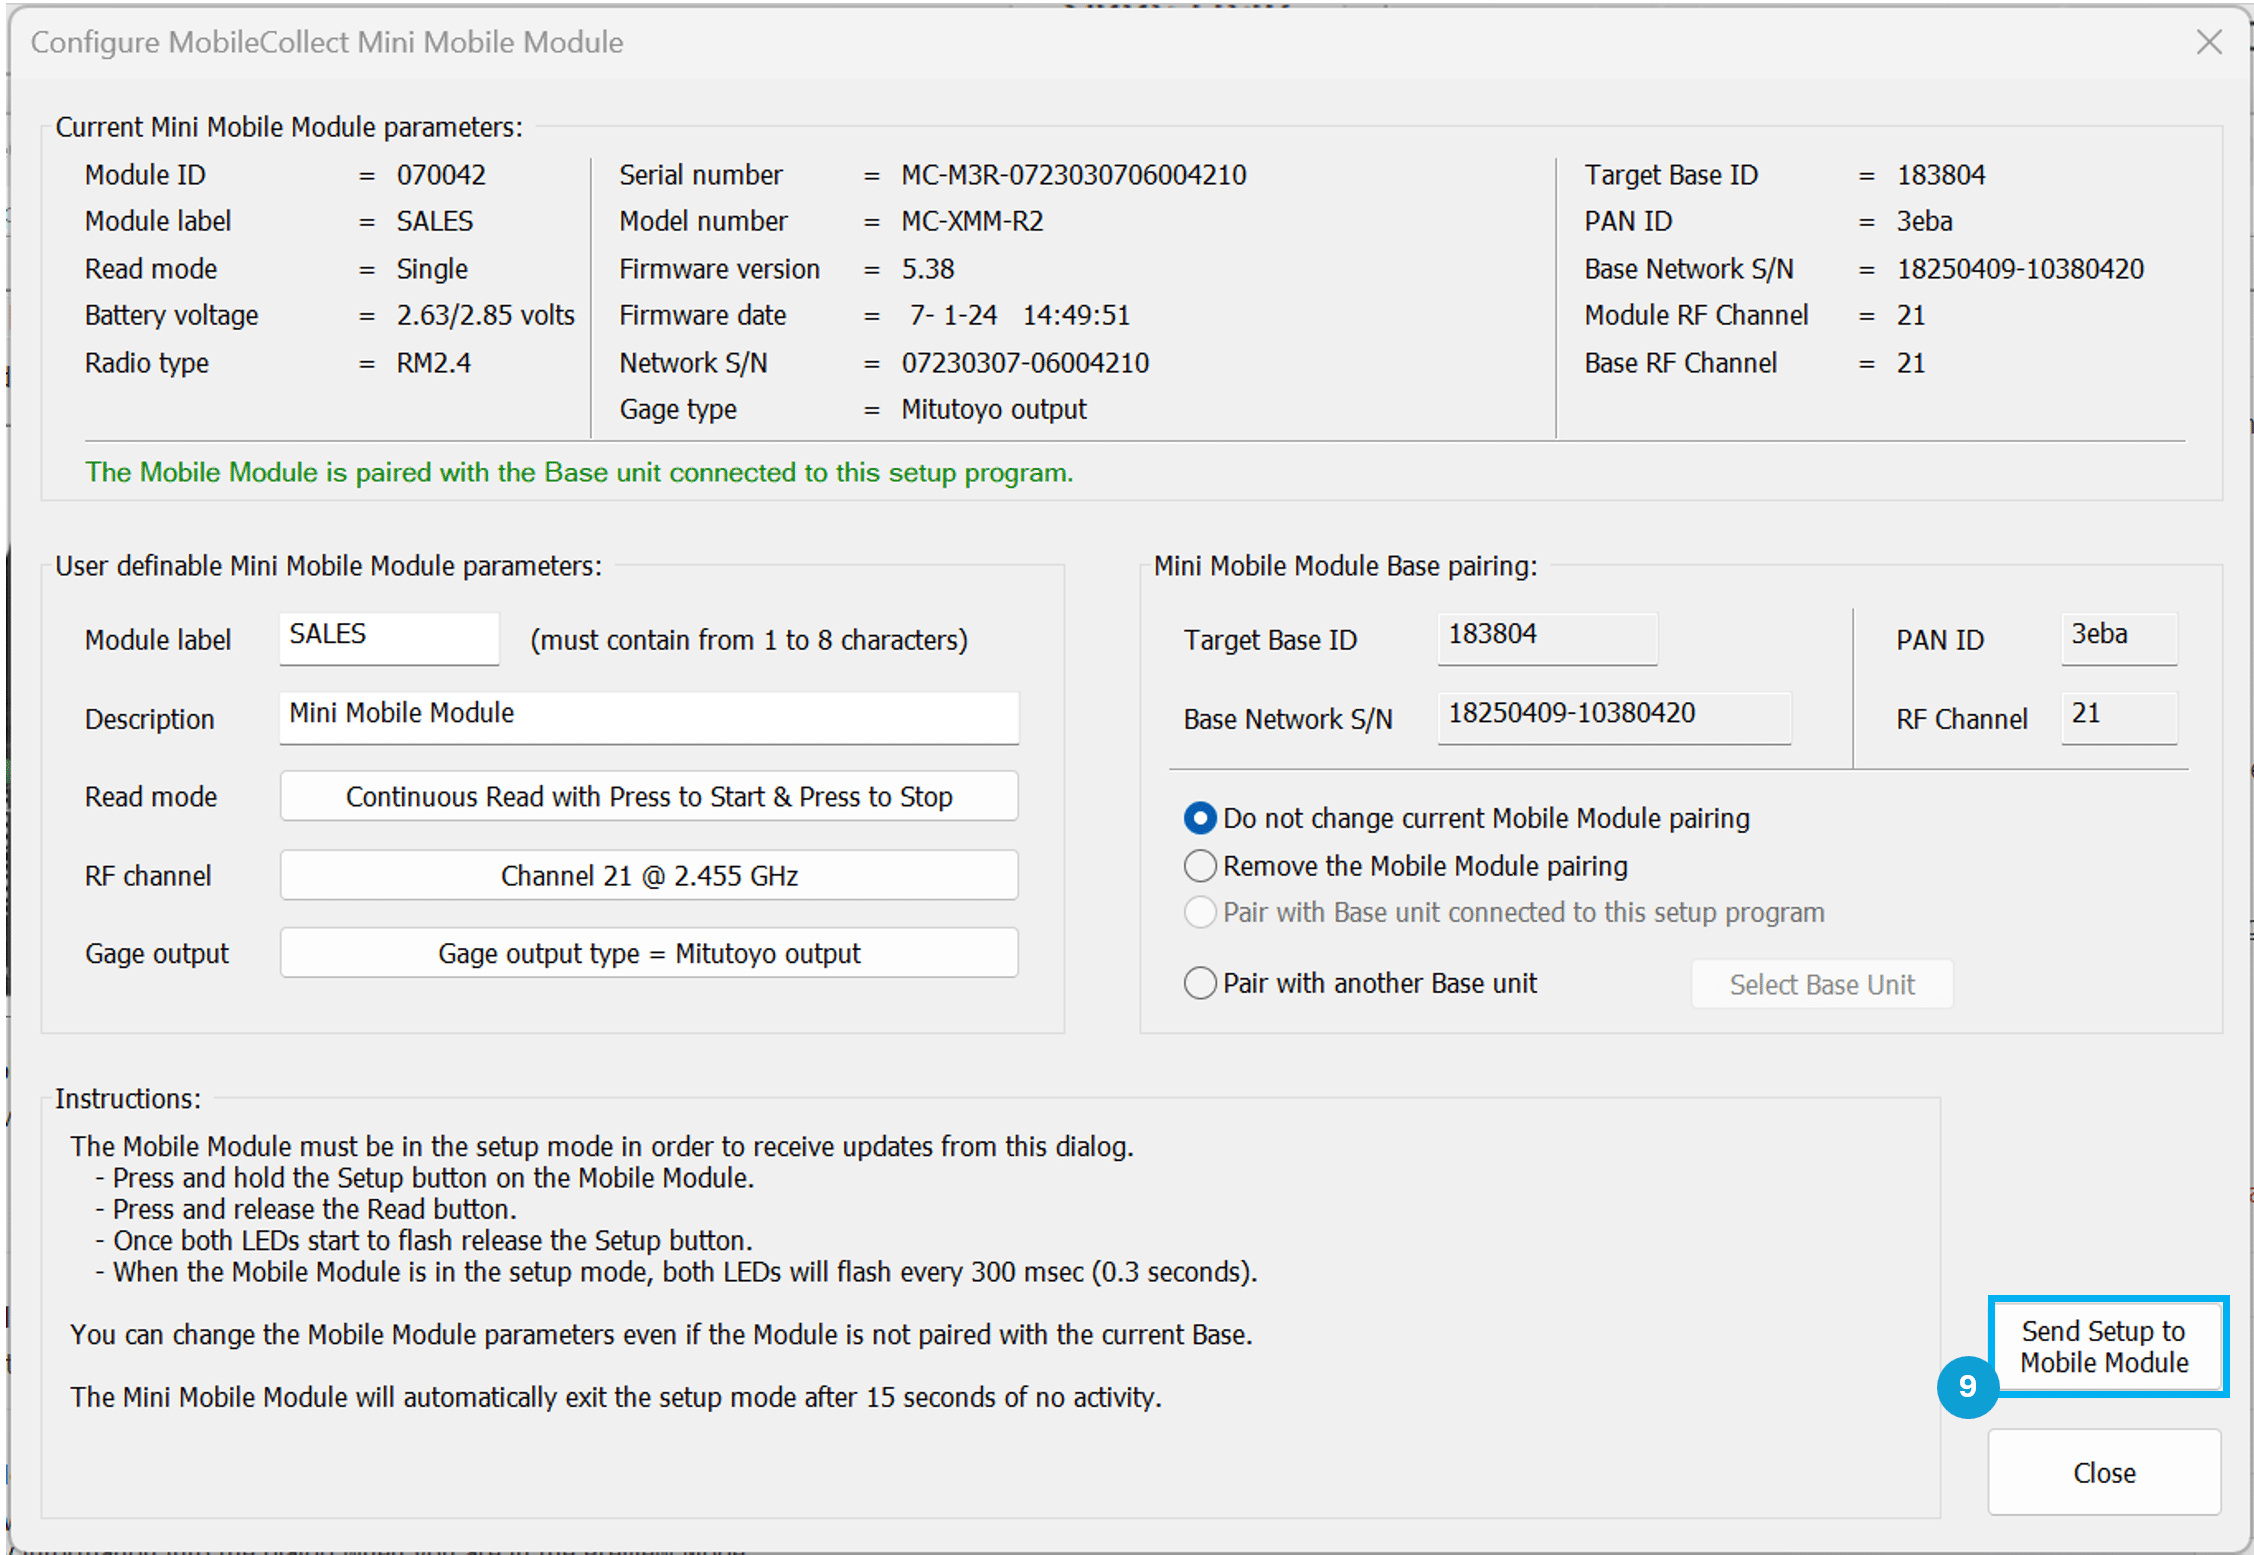
Extended Setup - Send Setup to Mobile Module
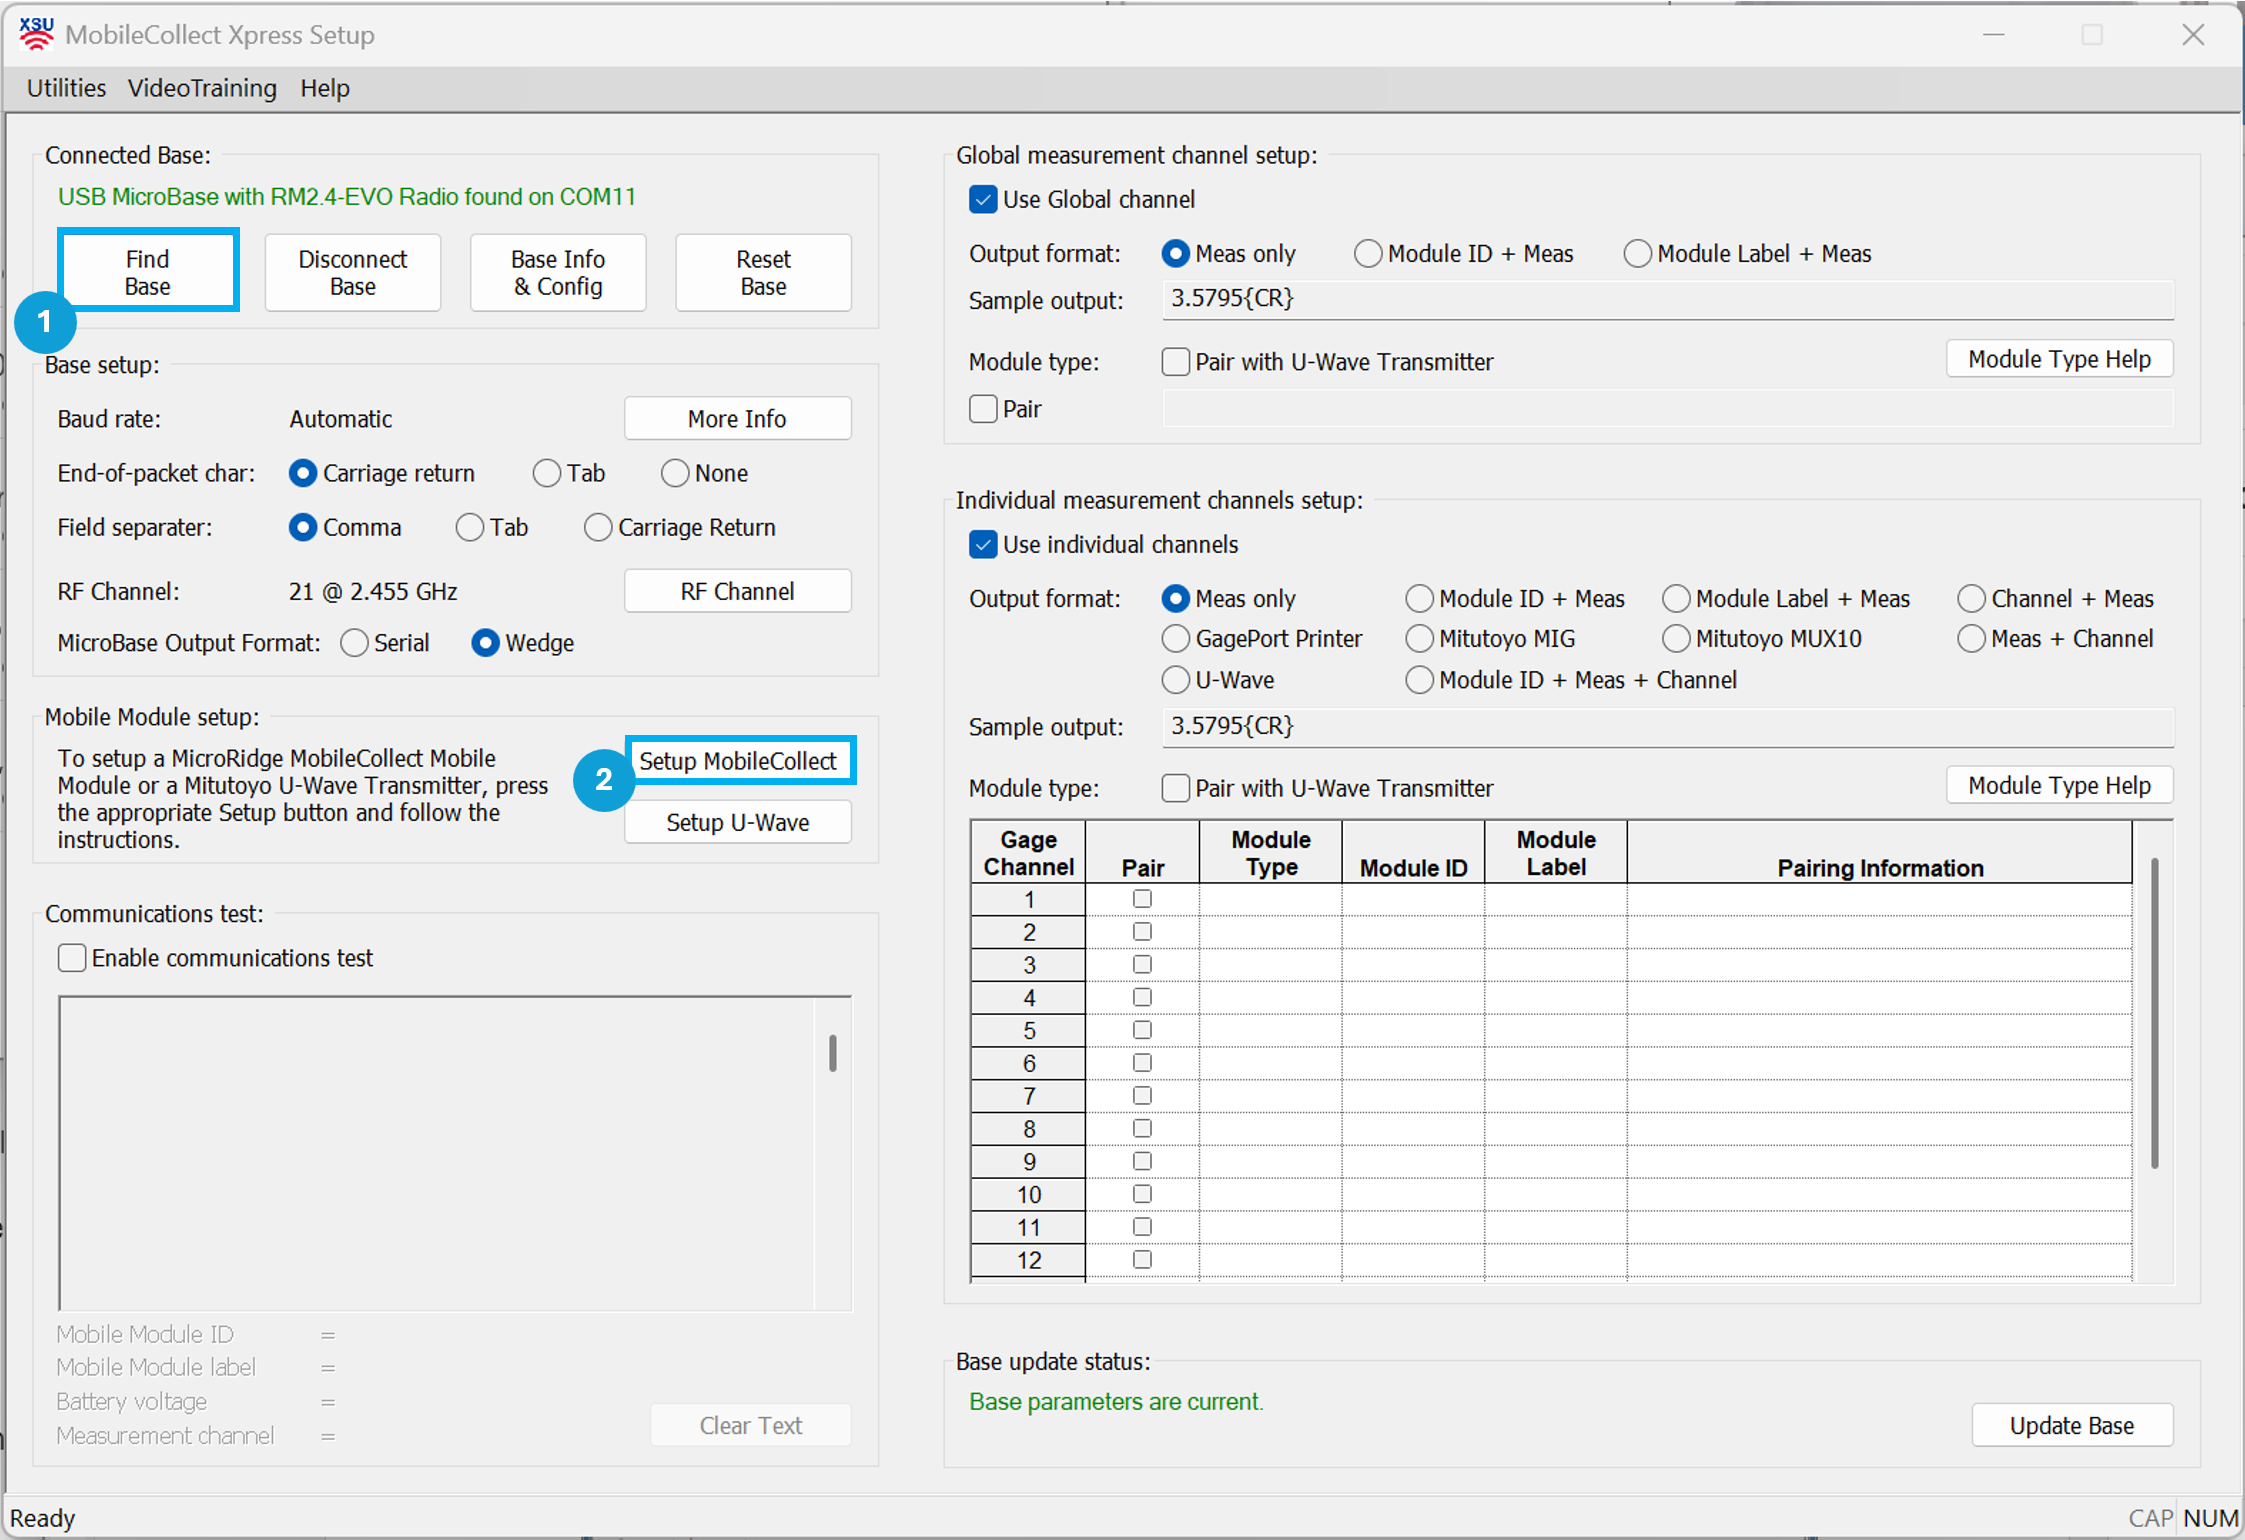
Xpress Setup - Update Mobile Module
Downloadable PDF Guide
Change Read Mode – MobileCollect Mobile Module
Feature Guide – This step by step procedure guides you on how to change the …